How to clean your projector the right way
A clean well maintained projector will give you a sharper picture and last significantly longer. Overtime, dust and dirt can build up in various places on and inside your projector which will negatively impact its functionality.
So how do you properly clean a projector to make sure you don’t damage the device and that it works perfectly every time you power it up.
Each part of your projector will require a different method for cleaning.
Here are the steps to clean your projector the right way.
Step 1: Make sure your projector is off and let it cool down

Before cleaning any part of your projector, turn it off and let it cool down for at least 30 minutes. Unplug it from the power source. This will help ensure you don’t damage any of the components.
Step 2: Remove the projector from the mounting
While it might be annoying to realign the projector after you clean it, it’s significantly more difficult to clean if it’s mounted above your head. If you’re trying to clean it while standing on a ladder you could also fall and hurt yourself.
If you decide to clean your projector while it’s still mounted, be extra careful!
Also be careful not to jostle the projector. Even the littlest bump can knock it out of alignment.
Cleaning The Body Of The Projector
Step 3: Clean the exterior of the projector

Wipe down the outside with a soft, dry lint-free cloth that attracts dust.
Step 4: Clean Stubborn dirt off the projector
Simply take a damp cloth and wipe down the outside of the projector. Follow it up with a dry paper towel to remove any excess moisture on the casing. If needed you can use a mild soap. Don’t use an abrasive surface as it could scratch the projector chassis.
Cleaning The Projector Air Filter and Intake Vents
Clean the intake vents every 3 to 6 months depending on the operating environment. Epson recommends you clean the air filters and air intake vents on your projector after every 100 hours of use. If they aren’t periodically cleaned, intake vents and filters can become clogged with dust that can prevent ventilation and cause overheating and damage to the projector.
Step 5: To clean the intake vents use a small vacuum

Use a small vacuum cleaner designed for computers or office equipment. It’s not advised to use a fully powered vacuum you’d use on carpets.
While you might be tempted to use compressed air on the vents and filters, DON’T! Compressed air can blow dust further into the projector and also leave residue that
could clog the filters.
Step 6: For stubborn dirt on the intake vents

If there is still dust and debris on the intake vents use a dry duster or lint-free cloth that attracts dust like a Swiffer duster. Gently wipe the vents taking extra care not to knock dust further into the projector.
Don’t push the dust cloth too far into the projector or it could damage the components inside.
Step 7: Clean the air filter

If your projector has a removable air filter, take it out of the projector and use the small vacuum to clean it.
You can also use a soft lens brush or blower to clean the filter.

Don’t use a damp cloth to clean it which could attract more dust.
Replace the filter if it is broken or the dirt is too difficult to remove.
Cleaning The Lens Of The Projector
Clean your projector's lens periodically, or whenever you notice dust or smudges on the surface. Don’t clean it too often, only when it impacts your viewing experience.
Step 8: Dust the projector lens with a blower
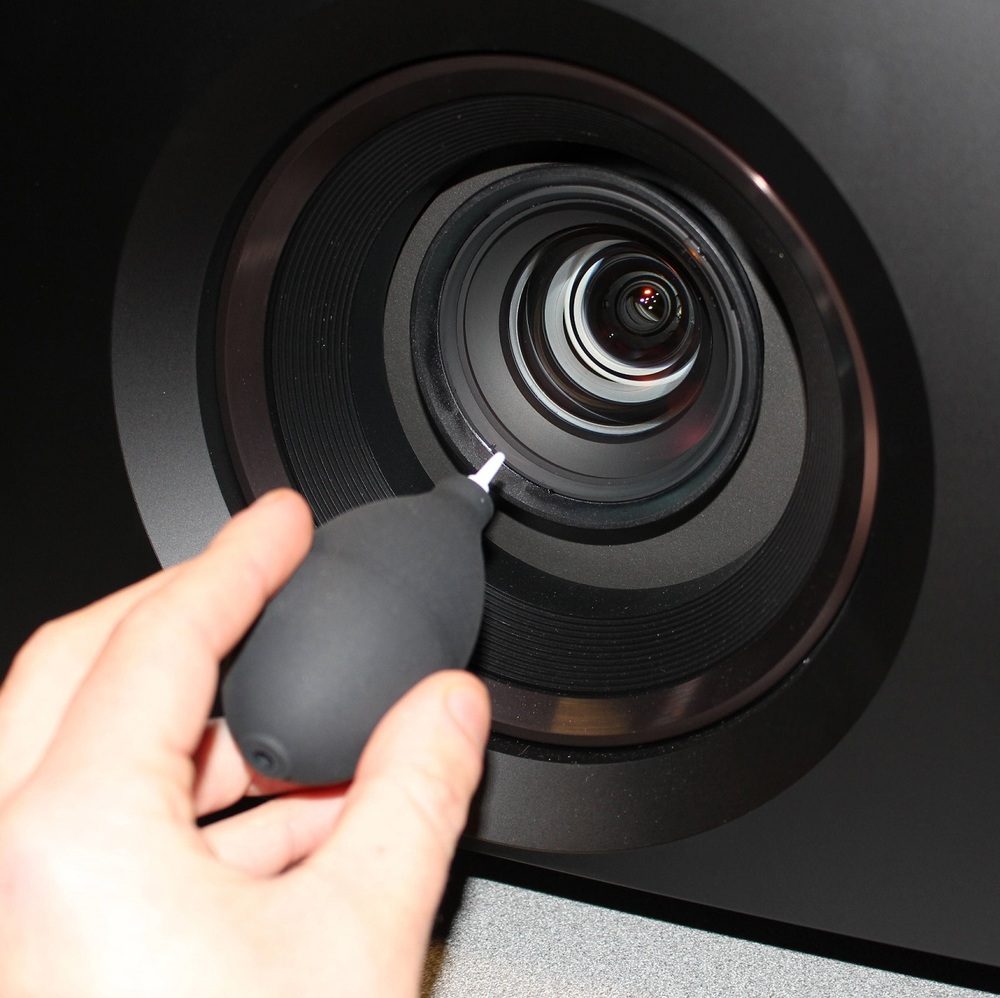
Start with a blower to get rid of any dust and residue. Don’t use your breath or you could increase condensation on the lens. Don’t use compressed air as it could blow the dust particles into the projector or leave residue on the lens.
Step 9: Use a lens brush

If the blower isn’t enough use a specially made lens brush to dust away any particles. These extra soft brushes won’t scratch the glass. Try not to touch the brush with your hands because oils could get on the brush which could harm the lens.
Step 10: Clean the projector lens with a lens cleaner
Use camera lens cleaner as a last resort because you don’t want to risk streaks on the glass surface. Most solutions are alcohol-based to avoid leaving any streaks.
Put a drop or two of optical lens cleaner on lens cleaning paper. Wipe the lens in a circular motion starting from the middle of the lens.
- Don’t spray the cleaner directly onto the lens.
- Do not use regular glass cleaner or any harsh chemicals to clean the lens
- Don’t use regular tissues as they could scratch your lens.
- Don’t reuse lens cleaning tissues
- Don’t clean your lens too often
Step 11: Replace the lens cap when not in use

The best way to prevent dust from getting on the lens is to put the lens cap on the projector when you’re not using it.
(NOT) Cleaning the Inside of the Projector
WE DO NOT RECOMMEND OPENING THE PROJECTOR. TAKE IT TO A SERVICE PROFESSIONAL
Modern projectors are filled with fragile components. Opening the projector and attempting to clean the innards yourself can easily cause irreparable damage. Quality made projectors are designed to not need any internal maintenance. As long as you regularly change the air filters and keep the vents clear you will not need to open up your projector.
If somehow, something does get into your projector take it to an authorized service professional to get it cleaned.
How Often Should You Clean Your Projector?
You should clean the dust off your projector on a weekly basis. Clean the vents and filters every 3-6 month. Only clean the projector lens when it needs to be cleaned. You can use the hand blower to clear dust off the lens on a monthly basis.


