


Best Projectors for Christopher Nolan’s The Odyssey

Christopher Nolan’s The Odyssey makes a great case for a big screen. Here’s what I’d buy for three very different rooms.
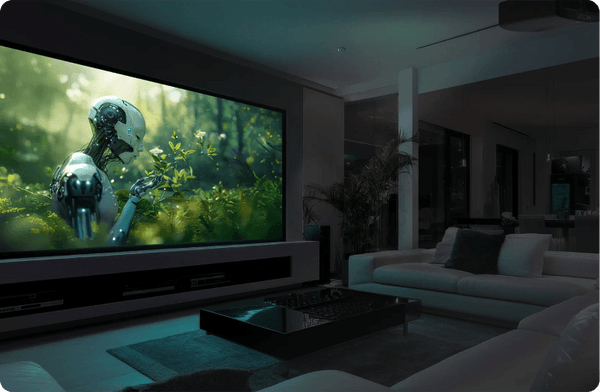
Watch what happens to the people in Universal’s format trailer when you switch from the wide 35mm frame to the tall IMAX 70mm frame. The sea and sky get more space around them. Even at home, a picture wide enough to occupy a good part of your field of view can give those horizons real scale. It also gives you time to look into the frame and pick out texture in water, faces and costumes.
Cinematographer Hoyte van Hoytema shot on Kodak 65mm negative film, using 250D for daylight and brighter interiors and 500T for night and low light. In his Kodak interview he describes shooting on water and rigging lights to behave like fire during the sack of Troy. That’s the kind of scene I’d use to dial in HDR once the disc arrives.
What you’ll actually see at home
Theatrical. IMAX calls this the first theatrical release shot entirely with IMAX 70mm film cameras. The camera negative is 15-perf 65mm. The 70mm IMAX prints show the 1.43:1 presentation, as did select IMAX with Laser venues. Universal’s format trailer also demonstrates 1.90:1 digital IMAX, 2.20:1 70mm, 2.39:1 35mm and 1.85:1 and 2.39:1 Dolby Cinema or premium large-format presentations.
Home. Universal Pictures Home Entertainment announced a November 17 digital and disc release for the U.S. and Canada. The specs list a 100GB 4K UHD disc with HDR, a 1.78:1 (16:9) aspect ratio on UHD and Blu-ray and an English DTS-HD Master Audio 5.1 track. The announcement leaves the exact HDR format, mastering metadata and any IMAX Enhanced edition unconfirmed. The IMAX Exclusive Prologue is a disc bonus.
What an IMAX button buys you
A picture preset is a set of display settings. On some models the option appears with HDR10 and changes how the projector renders the same incoming picture. IMAX Enhanced certification is a separate device qualification under the IMAX and DTS program. IMAX Enhanced content is a specific home edition with its own video and audio features, delivered by a participating service or a compatible disc. A projector can have a selectable preset, while the player, app, subscription and receiver each determine which parts of a particular edition you actually get. Disney+ is a good example: the expanded picture works on supported Disney+ devices, while its IMAX Enhanced DTS:X has more specific requirements.
Framing is baked into the version you play. A preset cannot add the top and bottom of an IMAX print to a home master. The 16:9 disc listing is the number I’d use to plan the screen. On a 2.39:1 screen, set a second lens position that fits 16:9 by height. It will use about three-quarters of the screen width, with unused space at each side. Fitting by width would crop the taller picture. Save scope-fill zoom for scope material. A 16:9 screen can show the listed disc frame full size and letterbox wider movies naturally.
The best projectors for The Odyssey at a glance
Every projector below is sold by ProjectorScreen.com. Prices were checked November 5, 2026. I’ve weighted the picture you can get in each room. The Epson and JVC are included as comparisons for 3LCD and black level, respectively.
Scroll the table to see IMAX support and screen pairings.
| Room | Projector | Picture and IMAX support | 16:9 screen pairing |
|---|---|---|---|
| Dedicated theater |
Sony BRAVIA Projector 8 $15,998 |
Native 4K SXRD IMAX Enhanced preset |
120-inch Stewart Harmony G3 |
| Dedicated theater |
JVC DLA-NZ700 $7,999.95 |
Native 4K D-ILA Contrast comparison |
120-inch Stewart StudioTek 100 |
| Blackout movie room |
Hisense XR10 $4,497.97 |
RGB laser DLP Certified · IMAX Cinema |
110-inch Stewart StudioTek 100 |
| Blackout movie room |
XGIMI TITAN Noir Max $5,999 |
RGB laser DLP IMAX Enhanced preset |
120-inch Stewart StudioTek 100 |
| Blackout movie room |
Epson QB1000 $8,499 |
Pixel-shift 3LCD 3LCD comparison |
128-inch Elite Sable Frame 2 |
| Living room |
Hisense PX3-Pro $2,497.97 |
RGB laser UST Certified · IMAX Mode |
100-inch Spectra Vantage |
| Living room |
Hisense PX4 Pro $3,997.97 |
RGB laser UST Certified · IMAX Cinema |
120-inch Spectra Phoenix |
Sequential contrast measures white and black on separate patterns. Checkerboard contrast puts both in the same frame, where reflected light matters. Read each measurement with its mode, screen and settings.
1. A dedicated theater with dark surfaces
Turn off the lights and play a scene with something bright at the center and dark detail around it. In a dark theater you can see what the projector does with both parts of the same shot. That’s where I’d spend on black level, a lens that holds fine detail into the corners and tone mapping that keeps some bite in the highlights. The better the room, the easier it is to see where the extra money went.
Sony BRAVIA Projector 8 · Premium optics and an IMAX Enhanced preset

The Projector 8 uses native 3840 × 2160 SXRD panels, a motorized 2.1× ACF lens and Sony’s XR Dynamic Tone Mapping. The lens is a reason to spend here if you want a large, sharply focused image and the flexibility to move between 16:9 and scope. Sony rates it at 2,700 lumens. Projector Reviews measured 2,590 ANSI lumens at a near-D65 6,657 K in IMAX Enhanced and 2,300 in Cinema Film 2 on its unit. That’s a more useful comparison for movies than the cooler Bright Cinema result. Sony’s Projector 8 specifications · Projector Reviews’ instrumented test · Our ProjectorScreen demo coverage
IMAX playback. Select Picture → Calib. Preset → IMAX Enhanced. The projector remembers the preset separately for each HDMI input and accepts HDR10 and HLG from an external player. Sony documents compatibility with IMAX Enhanced content. Its separate certification list does not establish certification for this exact model. For an ordinary HDR10 disc, I’d compare IMAX Enhanced with Cinema Film 2 or a calibrated User setting on the same input.
Screen pairing. A 120-inch Stewart WallScreen 2.5 with woven Harmony G3 puts the center channel behind the picture, where dialogue belongs. The material is rated 0.7 gain by Stewart, so allow for the light loss, keep the space behind it dark and plan the speaker-to-screen clearance. If the speakers sit outside the image, use the neutral, unity-gain StudioTek 100 and keep the light. Shop the 120-inch Harmony G3 · Stewart’s Harmony G3 material data · Shop the 120-inch StudioTek 100
JVC DLA-NZ700 · The contrast-first comparison

I’d put the NZ700 high on the list if the room is dark enough to show what its D-ILA panels can do. In our review, a calibrated SDR setup on a 92-inch, 1.3-gain screen produced 135 nits white and 0.0026 nit on full black at midzoom, laser 93 and aperture −11. That’s over 50,000:1 sequential native contrast in that setup. JVC rates 80,000:1 native and 2,300 lumens. Our reviewer measured 2,050 lumens in Natural at D65 and 1,630 with the wide-color filter engaged. That filter decision gets more consequential as the image grows. Our JVC NZ700 review
JVC documents Frame Adapt HDR for HDR10 and a separate HDR10+ mode via HDMI. Its published picture menu has no IMAX preset. “Shadow detail is preserved while highlights are accurately represented,” our reviewer wrote about its HDR performance. I’d choose this JVC when that balance and the deeper black floor matter more than having a named mode. Use the powered installation memories if you switch between a 16:9 fit and a scope zoom.
Screen pairing. The 120-inch Stewart StudioTek 100 is a neutral starting point in a dark room. Start smaller if you sit close, or if you plan to engage the wide-color filter most of the time. Shop the 120-inch StudioTek 100
2. A multipurpose room that can go fully dark
Blackout shades can stop the sun. The next light source is your own screen. A white ceiling, pale walls and a shiny floor bounce light back into the picture. You see the damage in a shot with a bright sky and dark foreground, even if the room goes completely dark during a fade. Start with the surfaces the screen lights up most. That’s usually the ceiling and side walls nearest the screen, followed by the floor and any pale or shiny furniture in front of it.
Permanent changes. Paint the screen wall and the first stretch of ceiling and side walls in a dark, matte finish. Use darker carpet or a large low-sheen rug and choose matte furniture and cabinet finishes. Reversible changes. Fit blackout curtains or shades that overlap the opening, block light at the door, hang dark curtains on tracks beside the screen and use securely mounted removable fabric panels overhead. A dark rug and a throw over a pale ottoman can tell you quickly where a permanent treatment would help. Keep ceiling fixtures, vents and sprinklers clear.
Hisense XR10 · The RGB laser value for a big picture

The XR10 has the light output to make a large image feel alive in an accurate mode. Hisense rates it at 6,000 ANSI lumens. In my review I measured 4,820 lumens in HDR Filmmaker with a full-white pattern, a 4×4 grid, centered lens shift and roughly 1.5× zoom. On a 110-inch StudioTek 100, IMAX Cinema was a little warmer than Filmmaker and both rolled off highlights gradually. ProjectorCentral’s separate nine-point test came in at 3,969 ANSI lumens in HDR IMAX Cinema with Brightness Enhancer off. The modes and measurements deserve their own labels. Hisense’s XR10 specs · My Hisense XR10 review ·
IMAX playback. CES lists the XR10 as IMAX Enhanced certified. I verified IMAX Cinema with an HDR10 signal. Dolby Vision has its own picture modes. For an external UHD player or streamer, use HDMI 2 or 3 with the appropriate enhanced signal format and reserve HDMI 2 for eARC if your system uses it. The manual documents IMAX content auto-detection with app and region exceptions. Check the actual signal and available presets in the built-in app or on the HDMI input you use.
Screen pairing. My starting point is the 110-inch StudioTek 100 on a treated front wall. In the same darkened workshop I measured 337:1 on a 4×4 checkerboard on the matte Stewart and 740:1 from the simulated seats with the directional Spectra Shadowscape. White dropped from about 394 to 174 nits. That’s a real trade if you can’t darken the room surfaces. Check the Shadowscape’s throw requirements and the view from the widest seat. Shop the 110-inch StudioTek 100 · Shop the 110-inch Spectra Shadowscape
XGIMI TITAN Noir Max · RGB laser with dual irises and lens memory

The TITAN gives you another way to spend your budget. The powered lens and dual irises make sense if you have an external player, a screen that can take real light output and a room dark enough to use the iris. XGIMI rates 7,000 ISO lumens and up to 10,000:1 native contrast. ProjectorCentral measured 3,788 ANSI lumens in the IMAX Enhanced preset at laser level 10. The brighter 10+ setting was unavailable in that preset on its test unit. The same review found roughly 2,200:1 sequential contrast with the irises open and dynamic laser control off. Enabling dynamic control and stopping down the iris raised the measured ratio substantially, with some shadow detail lost. Start with the dynamic black control off and judge what happens to actual dark shots before deciding.
IMAX playback. The manual lists an IMAX Enhanced preset for compatible content and per-input controls on HDMI 1, 2 and 3. HDMI 1 also carries eARC. ProjectorCentral found the preset with HDR10 input, with Dolby Vision and HDR10+ using their own modes. Bring a disc player or streamer. There’s no built-in streaming platform. Use the stored zoom and shift for your 16:9 and scope positions, then check focus at both.
Screen pairing. A 120-inch StudioTek 100 is my starting point. The unity-gain matte material gives you a baseline for dialing in the lens aperture, color and HDR. Shop the 120-inch StudioTek 100
Epson QB1000 · The 3LCD comparison

If you see color breakup on single-chip DLP projectors, the QB1000’s three LCD panels are a good reason to audition it. It uses four-phase pixel shifting for UHD and has a powered lens with ten memories. Our reviewer measured 2,813 lumens in Natural and 3,526 in Dynamic, against Epson’s 3,300-lumen rating. Calibrated SDR Natural at laser 50 gave 5,577:1 on screen in that installation. For movies over HDMI, the Epson gives you dynamic tone mapping with HDR10 and supports HDR10+. The manual’s color-mode table has no IMAX preset
Screen pairing. Start with a 128-inch Elite Sable Frame 2, a 16:9 fixed frame with CineWhite UHD-B material. Its rated 1.3 gain gives you some extra light on axis. Check the off-axis view if you have a wide seating row. Shop the 128-inch Elite Sable Frame 2
3. A living-room theater with an ultra-short-throw projector
You can get a big picture from a cabinet without running a projector across the room. The screen and cabinet are part of the optical system. Start with curtains or shades, kill the ceiling lights over the image and keep any lamp out of the screen’s direct line of sight. The less light that lands on the screen, the easier it is to see dark detail. If you want a little light for company, try a low lamp behind the seating area and check the image with the lamp on.
A UST lenticular screen uses angled ridges to accept the steep beam from below and reject much of the light from above. It’s where I’d start for a wide couch or seats spread across the room. A UST Fresnel screen redirects the beam toward the seats and can also help with some off-axis light. A higher-gain model like the Helios makes more sense with centered seats. Try the widest seat for brightness and uniformity, and look for spill on the ceiling. Check the actual light directions and the specific screen’s viewing cone. Install either material with the correct side up and the projector where the screen manufacturer specifies. Spectra Vantage lenticular specifications · Spectra Helios Fresnel specifications
Draw the image on the wall before buying furniture. Use the projector’s placement diagram to calculate the cabinet top, chassis depth, rear clearance and the offset to the bottom of the image. Include the screen’s stand-off from the wall and any floor-riser housing and black leader. Then sit down. Check whether the bottom of the picture is too high and whether a center speaker or soundbar will obstruct the beam. A UST magnifies small placement errors and ripples in the screen. Get the cabinet and projector level and square before touching digital correction.
Hisense PX3-Pro · The 100-inch living-room value

At its current price I’d start here for 100 inches and use the savings to get the screen and light control right. Hisense rates it at 3,000 ANSI lumens. Our reviewer found that “The lens quality is very good overall, with nice sharpness in all corners.” In the review’s calibrated setup on a 0.6-gain ALR screen, HDR10 IMAX Mode measured 0.0168 nit black with active pixels on the screen, versus 0.0337 nit in most of the other HDR presets. A full black pattern measured lower still. Those figures describe that screen and setup. Our Hisense PX3-Pro review
IMAX playback. Hisense lists the PX3-Pro as IMAX Enhanced certified. We verified IMAX Mode on an HDR10 input. Set the connected input to Enhanced Format for 4K HDR. Use HDMI 1 or 2 for your UHD player or streamer and HDMI 3 for eARC. Dolby Vision calls up its own modes. For the built-in Google TV apps, check the title version and the signal the app actually delivers. The mode appearing on HDMI does not establish that a built-in app delivers an IMAX Enhanced edition or DTS:X audio.
Screen pairing. Use the 100-inch Spectra Vantage, a 0.5-gain fixed lenticular screen. Its size preserves light output and is a practical fit across a typical couch. Shop the 100-inch Spectra Vantage
Hisense PX4 Pro · Spend more for a usable iris

The PX4 Pro gives you more light to work with and an optical iris that lets you trade some of it for better blacks. Hisense rates it at 3,500 ANSI lumens. In my review, calibrated HDR Theater on a 100-inch StudioTek 100 measured 3,021:1 sequential contrast with the iris open and roughly 2,088 compensated screen-derived lumens. Manual 3 gave me 4,144:1 at 83% of open output and Manual 4 gave 4,629:1 at about 73%. Those are full-field sequential measurements with the dynamic controls and Brightness Enhancer off. As I wrote in the review, “The iris turns surplus light into better blacks instead of leaving that output unused.” I’d spend the extra for that control if the room does movie duty most nights. My Hisense PX4 Pro review
IMAX playback. Hisense lists IMAX Enhanced certification and I verified IMAX Cinema with external HDR10 test signals. It mapped darker than HDR Theater in my tests. I’d start in HDR Theater with a standard HDR10 source and compare IMAX Cinema on the same scene. Dolby Vision and HDR10+ bring up separate presets. Use HDMI 1 or 2 for an external UHD player, with HDMI 3 available for eARC. Check the actual title version and input signal with built-in VIDAA apps. Automatic IMAX switching and IMAX Enhanced DTS:X on a particular app or external streamer depend on the complete path. ProjectorCentral measured 5,425:1 with Dynamic Iris in default HDR Theater on a later unit and saw brightness pumping on some cuts. Compare it to a manual setting if that control is available on your firmware.
Screen pairing. Choose the 120-inch Spectra Phoenix 0.7-gain lenticular floor-riser if the living room needs its wall back between movies. I used the 100-inch version for part of my review. Size the cabinet around the housing and image offset. For a permanent screen and centered seating, the 120-inch Spectra Helios 1.35-gain Fresnel is worth auditioning from every seat. Shop the 120-inch Spectra Phoenix · Shop the 120-inch Spectra Helios
Set up for movie night
- Size the screen from your seat. Mark out 100, 110 or 120 inches in 16:9 and look at it from the closest and widest seats. At 12 feet a 120-inch 16:9 image spans about 40 degrees horizontally. Going from 120 to 150 inches cuts screen brightness to about 64% at the same light output and gain. Confirm throw, lens shift or UST cabinet placement before you order. ProjectorScreen’s placement and screen calculators
- Check your edition. Confirm the feature’s picture format and ratio on the disc or service, including any separate IMAX Enhanced version selector. Use the full 16:9 lens position for the listed disc framing. If you have a scope screen, test that the full picture and subtitles fit inside it before saving the position.
- Verify the signal directly. Start with the player straight into the right HDMI input. Enable its enhanced signal setting if required and have the player match the title’s dynamic range and frame rate. Check the projector’s signal info. Add the AVR, switch or in-wall cable and check again. Use the app’s playback details when streaming directly on a projector.
- Set HDR with the room dark. Use a cinema or Filmmaker preset as a baseline and match laser power and iris to screen size. Use a bright scene and a dark scene with detail, then compare the IMAX preset if available. Watch for clipped firelight, crushed shadows, obvious brightness pumping and smoothed-away grain. Start with motion interpolation off for film.
- Check the whole row. Watch from the edges for screen falloff, color breakup or laser speckle, and look for light washing onto the ceiling. Close curtains and adjust the room before compensating with picture controls.
For The Odyssey, I’d pick the Sony if the dedicated theater and speaker layout justify its lens and the woven screen, the XR10 if I need to light up a big matte screen in a room that doubles as something else, and the PX4 Pro if the living room needs to do theater duty. Put up a picture big enough to feel the distance to the horizon. Then make the room dark enough to see what’s happening beneath it.
If gaming drives your purchase, see our guide Best Projectors for Grand Theft Auto 6.
Need help sizing a screen or getting the UST cabinet right? Talk to a ProjectorScreen specialist or call 888-392-4814.


