


The Complete Guide To Outdoor Projectors and Screens

The chairs rarely match, and agreeing on a movie can take longer than setting up the screen. Then darkness falls, the opening credits roll, and the conversation gives way to the soundtrack. The same backyard where you spent the afternoon is now your movie theater.
There’s a little bit of drive-in magic in a backyard movie night, but with your own kitchen just a few steps away. It’s a way to keep friends around after dinner or introduce the kids to an old favorite on a screen that does it justice. A good first outdoor movie night tends to end with someone asking when you’re doing it again.
You can put up a portable screen for the evening or fit a retractable one to a covered patio. The easier the setup, the more often you’ll use it. This guide covers projectors, screens, sound and setup for small yards and larger gatherings.
How Does Outdoor Movie Watching Differ from Indoor Viewing?
Outside, the sky and nearby lights have a major effect on picture contrast. A brighter projector can make the image easier to see, but it cannot remove light already falling on the screen. Reduce that light to improve dark scenes.
Built-in speakers may be enough for a small group close to the projector. For a larger audience, plan on external sound and test the dialogue from the farthest seat.
The models in this guide need AC power and offer more brightness for larger outdoor screens. Battery-powered projectors can work on smaller screens after dark, but check their output and runtime in battery mode. Away from an outlet, use a portable power station with enough AC output and battery capacity for the complete system.
Protect the projector from rain, sprinklers, dew and condensation. Bring it indoors after use.

The Outdoor Projector and Screen Combo
Use these combinations as planning starting points for a 1.0-gain screen. The lumen targets refer to output in the picture mode you plan to use. Full darkness gives the best contrast; whether you can start earlier depends on the light reaching the screen.
Quick outdoor movie setup recommendations
| Scenario | Usable-output planning target | Screen starting point | Best viewing time |
|---|---|---|---|
| Small or average backyard | About 2,000–3,000 lumens at the screen | 100–120-inch folding-frame screen | Dusk to full darkness |
| Bright premium backyard setup | About 3,500–5,000 lumens at the screen | 120–150-inch tensioned screen | Late twilight to darkness |
| Short yard or high-traffic space | Match output to screen area; 2,000–3,000 lumens for 100–120 inches | 100–120 inches at this output; check brightness separately for 150 inches | After sunset |
| Large neighborhood or school event | About 5,000–7,000+ lumens at the screen | 150–200-inch folding or inflatable screen | Full darkness |
| Permanently mounted patio screen | Bright projector stored indoors between uses | Weather-rated retractable screen | Dusk to darkness |
| Rear-projection setup | Projector with enough output for the selected rear-projection material | Front/rear-compatible screen with clear space behind it | After sunset |
Viewing times are estimates, not guarantees.
Usable output is the light a projector produces in the picture mode and settings you plan to use. A model rated at 3,000 ANSI or ISO lumens may only produce about 2,000 lumens in quiet, color-accurate movie mode. Optical zoom position and lens shift can change output as well. Many projectors have a brighter mode that trades some color accuracy for more light and may increase fan noise. Outdoors, that can be a useful compromise if the picture still looks good.
Check image size, throw distance and brightness with our projector and screen calculators before you order.
Outdoor Projectors
Projectors worth considering for backyard movies
We sell the models below. We selected them for their placement flexibility, portability and performance in our reviews where available. The second column lists manufacturer brightness ratings.
| Projector | Rated lumens | Best use and key considerations |
|---|---|---|
| Hisense XR10 | 6,000 ANSI | Premium 150–200-inch setup. Our review measured 4,820 lumens in HDR Filmmaker. Optical zoom and lens shift; 23.4 lb. |
| XGIMI Titan Noir Max | 7,000 ISO | Premium movies after dark. Dual iris and lens shift. Optical zoom with a 0.98–2.0:1 throw range. 17.9 lb. External video source required, such as an HDMI streamer or disc player. Size the screen using viewing-mode output. |
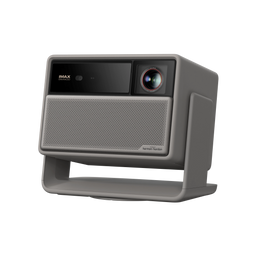
| XGIMI HORIZON 20 Max | 5,700 ISO | Bright 120–150-inch movies and gaming. Nearly 4,000 lumens after D65 calibration in our review. Optical zoom, lens shift, Google TV and sound. |
| Soundcore Nebula X1 | 3,500 ANSI | Designed as a portable projector with streaming and 40-watt audio. Retractable handle and motorized micro-gimbal for quick setup. |
| Soundcore Nebula X1 Pro | 3,500 ANSI | Rolling projector with a 400-watt, 7.1.4-channel speaker system, subwoofer and microphones. About 72 lb. Its IP43 rating applies only when closed and powered off. |
| Optoma GT3900UHD | 4,000 ISO | Short yards and gaming. Fixed 0.496:1 short throw; supported image sizes are 30–150 inches. External video source required, 15-watt speaker. IP6X covers dust, not rain. |
| Hisense C2 Ultra | 3,000 ANSI | Compact 100–120-inch setup. Gimbal, optical zoom, streaming apps and JBL 2.1 audio. |
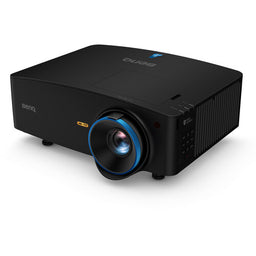
| BenQ LK936ST | 5,100 ANSI | Nighttime events and installations. Short throw, optical zoom and lens shift. External source required; 10-watt speaker, so plan audio for a crowd. |

- Sale
- Build a Bundle
- $100 Cash back
- $200 Cart Discount


$4,497.97
- Resolution: 4K
- Status: In Stock
- Refresh Rates: 240Hz
- Lumens: 6000
- Light Source: Laser
- Projector Type: Lifestyle
- Native Contrast Ratio: 6,000:1
- Build a Bundle
- Free $500 Gift
- $100 Cash back

$5,999.00
- Resolution: 4K
- Status: In Stock
- Lumens: 7000
- Light Source: Laser
- Projector Type: Standard Throw
- Native Contrast Ratio: 10,000:1
- Dynamic Contrast Ratio: 100,000:1
- Sale
- $50 Cash back
- $25 Cart Discount
$2,099.00
- Resolution: 4K
- Status: Leaves Warehouse within 2-3 Weeks
- Lumens: 5700
- Light Source: Laser
- Projector Type: Lifestyle
- Dynamic Contrast Ratio: 20,000:1
- Sale
- Build a Bundle

$4,299.00
- Resolution: 4K
- Status: In Stock
- Lumens: 3500
- Light Source: Laser
- Projector Type: Lifestyle
- Native Contrast Ratio: 5,000:1
- Dynamic Contrast Ratio: 56,000:1
- Build a Bundle
- $100 Cash back
- $100 Cart Discount
$4,899.00
- Resolution: 4K
- Status: In Stock
- Refresh Rates: 60 Hz
- Lumens: 5100
- Light Source: Laser
- Projector Type: Short Throw
- Dynamic Contrast Ratio: 3,000,000:1
The X1 Pro packages the X1’s projector hardware in a rolling case that serves as its stand, subwoofer enclosure, wireless-speaker charging station and storage. Both are rated at 3,500 ANSI lumens. If you already have suitable speakers, the smaller X1 may be a better fit. The X1 Pro’s upward-firing Atmos channels lack a ceiling to reflect sound overhead in an open yard. Our Nebula X1 Pro mobile theater review covers the complete system.

XGIMI Titan Noir Max: a premium option for movies after dark
Put the XGIMI Titan Noir Max alongside the Hisense XR10 when considering a substantial outdoor setup. Its zoom lens has a 0.98–2.0:1 throw-ratio range. For a 150-inch, 16:9 image, place the lens about 10.7–21.8 feet from the screen. Horizontal and vertical lens shift help with placement, but the maximum adjustments are not available together.
The dual iris offers a choice once the sky is dark: keep it open for more light, or close it to improve black levels, if the screen is already bright enough. XGIMI measures its 10,000:1 native-contrast claim at f/7.0 and the shortest throw setting; Brightness Boost locks the iris at f/2.0. Maximum brightness and maximum native contrast come from different settings.
The projector weighs 17.9 pounds; include its external power supply and video source when planning what you will carry. It has two 12-watt Harman/Kardon speakers and no built-in streaming platform. After dark, a 150-inch tensioned screen is a sensible starting point. Before stepping up to 200 inches, check the light output in the picture mode and iris setting you intend to use.
Why UST is no longer our default outdoor recommendation
Bright RGB-laser projectors now offer alternatives to UST for backyard viewing. Depending on the model, optical zoom, lens shift or a gimbal can simplify placement, while streaming apps and built-in sound reduce extra equipment. Some models also offer 3D or karaoke.
That leaves UST as a niche solution to specific space constraints. Its steep projection angle makes ripples and movement on a portable screen more noticeable, and alignment is trickier. Consider it when the projector must sit inches from the screen and you can provide a sheltered location and an exceptionally flat, compatible surface.
A flat matte-white screen can work with UST if the manufacturer approves that pairing. If you choose ALR material, verify that the exact screen is suitable for both UST projection and outdoor use.

Another flexible option: JMGO N3 Ultimate
The JMGO N3 Ultimate is a 4K RGB-laser projector with a motorized gimbal, optical zoom, horizontal and vertical lens shift, and Google TV. Check the retailer’s current delivery estimate before planning an event around it.
Its headline rating is 5,800 ISO lumens. In our N3 Ultimate review, we noted about 3,000 lumens after calibrating with a 110-inch, 1.0-gain Stewart StudioTek 100 screen. It can support 100- to 150-inch screens for after-dark viewing, with more brightness headroom at the smaller sizes.
Professional alternative for 150–200-inch events
The Optoma ZK608TST combines a 6,000-lumen manufacturer rating with a fixed short-throw lens, lens shift and HDBaseT. Schools, places of worship, and event organizers might prefer those installation features over built-in streaming.
It needs an external media source. Even with its two 15-watt speakers, a big outdoor crowd often needs powered speakers or a PA system.


Projector Brightness: How Many Lumens Do You Need?
The link between screen area and brightness is simple: if you spread the same light over double the area, the image becomes half as bright. Screen gain also affects the luminance seen from a particular viewing position.
Screen brightness is measured in nits (cd/m²). For planning, use this formula (or our screen calculator):
Estimated white luminance (nits) = lumens reaching the screen × gain × 3.426 ÷ screen area in square feet
Use output measured in the intended picture mode where possible. The formula estimates average screen brightness; it does not account for individual viewing angles or image uniformity.
For this guide, use 103–137 nits as a planning range after dark. A 171–206 nit target provides more brightness to work with when some ambient light remains. These are planning targets, not guarantees of good contrast: light falling on the screen can still wash out dark scenes.
This table is based on a 16:9 screen with a 1.0 gain.
| Screen size | Screen area | ≈103 nits | ≈137 nits | ≈206 nits |
|---|---|---|---|---|
| 100 inches | 29.7 sq. ft. | 890 lumens | 1,190 lumens | 1,780 lumens |
| 120 inches | 42.7 sq. ft. | 1,280 lumens | 1,710 lumens | 2,560 lumens |
| 150 inches | 66.8 sq. ft. | 2,000 lumens | 2,670 lumens | 4,010 lumens |
| 200 inches | 118.7 sq. ft. | 3,560 lumens | 4,750 lumens | 7,120 lumens |

For example, a 150-inch screen needs about 2,670 lumens to reach 137 nits. Choosing a projector that produces 3,500 to 5,000 lumens in the mode you use gives headroom for less favorable conditions. Conversely, a 200-inch screen can work with less than 5,000 lumens in sufficiently dark surroundings; it will simply run at a lower screen luminance.
Our guide to projector lumens covers brightness planning in more detail.
Read the brightness rating and the tested picture mode
ANSI and ISO ratings both report projector light output in lumens. Compare the test method and picture settings, and favor measurements taken in a mode you would actually watch.
Be more cautious with unqualified brightness numbers and terms such as “LED lumens.” Lux measures light falling on a surface. To estimate projector lumens, measure the average lux across a full-white image in a dark room and multiply by the image area in square meters. Screen gain is used separately to estimate reflected screen brightness.
Our projector reviews show how ratings compare with usable output. The Titan Noir Max’s 7,000-ISO-lumen rating comes from Performance Mode, which can alter color and increase fan noise. XGIMI recommends other modes for regular viewing.
Sunshine, shade and outdoor projection
Keep sunlight and bright fixtures off the screen. Deep shade can help with casual viewing before sunset, especially on a smaller image, but expect weak blacks while the sky remains bright. Save dark movies for later in the evening.
To avoid washing out black levels after dark, try switching off or redirecting porch, pool and landscape lights. Low-level path lighting can remain on as long as it is not shining onto the viewing surface.
What to Look for in a Backyard Projector
Our ultimate projector buying guide covers indoor and outdoor options. For use in the yard, pay attention to placement, brightness and how much equipment you want to carry.
Brightness, resolution and color
These projectors use pixel shifting to display a 3840 × 2160 image. Their imaging chips have fewer native pixels, but rapid optical shifts create additional pixel positions on screen. Many dedicated home theater projectors also use pixel shifting. HDR format support and accurate color are great, but they cannot restore shadow detail that ambient light has washed out.
Throw type and placement
Standard-throw projectors offer a wide choice of models, often with optical zoom. Their beams may cross the seating area, so plan chairs and walkways accordingly. Short-throw models make a large image from a few feet away and can often sit ahead of the front row. UST models sit closer still and need a very flat screen.
Rear projection puts the projector behind a compatible translucent screen, keeping the beam out of the audience area.
Check throw distance rather than relying on maximum-image-size claims. A projector may focus a very large image while producing too little light for the conditions.
Optical placement controls
Throw distance is measured from the lens to the screen. Throw ratio is that distance divided by image width. A 120-inch 16:9 image is about 8.7 feet wide, so a 1.2:1 lens needs roughly 10.5 feet between lens and screen. Check the model’s calculator or manual for the actual range and measurement reference.
Start with the lens centered left-to-right on the screen and aimed perpendicular to its surface. Keep the chassis level. Set its height using vertical lens shift, if available. A level projector does not necessarily place the lens at the center of the image. Some tabletop short-throw projectors naturally place most or all of the picture above lens height.
Optical zoom changes image size, and lens shift moves the image without tilting the projector or digitally reshaping the output. Keep the image within the manufacturer’s stated lens-shift limits. Keep in mind that maximum horizontal and vertical lens-shift adjustments may not be available simultaneously, and manufacturers do not all express their limits the same way. A small side table cannot be assumed to work simply because a projector has lens shift.
A gimbal tilts the projector or its optical engine; it does not provide the same adjustment as optical lens shift. Pointing the lens upward or sideways usually requires keystone correction to restore a proper rectangular image.
Digital correction is convenient for a temporary setup, but it resamples the image and can reduce usable resolution and image area. Get the physical placement as close as you can first.

Portability and all-in-one convenience
Handles, automatic focus, streaming apps and powerful built-in speakers can save setup time. A 23-pound projector takes more effort to carry and position than a compact model. When judging how portable the system is, include the stand, power cable, speakers, and source device.
Outdoor Projector Screens
Choose a screen with a neutral surface that stays flat under tension. Loose fabric is more likely to wrinkle or move. Front-projection screen material should block unwanted light from behind. In contrast, rear-projection material is designed to be translucent. Outdoors, the frame, supports and anchoring also have to suit the location.
Qualities to Look for in an Outdoor Projector Screen
Stability
A large screen behaves like a sail. At the same aspect ratio, a 200-inch image has four times the area of a 100-inch image, before counting the frame. More area means more wind load under otherwise similar conditions.
Follow the model’s anchoring instructions and wind limits. Use the specified stakes, ropes, supports, and ballast. Make sure guy lines are clear of pedestrian paths. A fence or wall may provide shelter, but it does not replace anchoring. Do not substitute guessed ballast weights for the manufacturer’s instructions. Elite’s current Yard Master 2 guidance allows light-breeze operation up to 7 mph. Follow the current instructions for the model. Allow time to take it down before reaching the limit.

Tensioning
Snap-on surfaces on folding frames and side tensioning on retractable screens help control wrinkles and edge curl. Flatness is important for all projectors. For short throw and UST models, even tiny surface bumps stand out more. Short-throw projectors can work with a flat, well-tensioned fabric screen; a rigid panel is not required.

Outdoor screens we sell
| Screen | Suitable use | Construction and limits |
|---|---|---|
| Elite Yard Master 2, 120-inch 16:9 | Most home backyards | Tool-free folding frame, tensioned surface, legs, stakes, ropes and carry bag. Temporary use only; anchor it fully, follow the model’s wind limits and store the surface clean and dry. |
| Elite Yard Master Plus, 200-inch | Large portable events | Adjustable-height folding frame and support for much larger sizes. More setup labor, storage space and wind exposure than a 120-inch screen. |
| Elite Yard Master Manual Tension, 115-inch | Permanent patio without electrical wiring | Tab-tensioned surface and outdoor pull-down housing; Elite’s main specification states IP65. Weather rating does not make the deployed fabric stormproof; retract it when unused. |
| Elite Yard Master Electric, 120-inch | Convenient permanent patio setup | IP33-rated motorized outdoor housing, RF remote and wide-viewing matte-white surface. Not tab-tensioned and intended for standard-throw use; secure and retract it as directed. |
| Stewart RS1, 120-inch example | Premium integrated patios | IP43-rated system, multiple mounting options and a choice of materials and tensioning. Made-to-order system that should be configured for the projector, throw and ambient-light direction. |
| Soundcore Nebula 200-Inch Silent Inflatable | Matched X1/X1 Pro event system | Sealed-air frame, 1.0-gain surface, battery-powered pump, water bags and quick-mount brackets for the X1 Pro front speakers. Large 200-inch area demands full anchoring, controlled light and strict attention to the model’s wind limit. |
| Epic Patio 200 silent inflatable | Quiet 200-inch backyard setup | Sealed-air frame lets the blower disconnect during the movie; replaceable front/rear surface. Requires careful inflation, anchoring and storage; follow the model’s wind instructions. |
The Soundcore screen also works with the standard X1 or another projector with enough usable output and a suitable throw distance. At 200 inches, even the X1 platform’s rated 3,500 lumens yields only about 101 nits at 1.0 gain, and that is before any reduction in a movie-mode output. Plan on full darkness at that size; a 120- to 150-inch screen provides more headroom.
Check current stock, lead time and the exact material configuration. Browse outdoor projector screens, portable screens and rear-projection screens for other sizes and layouts.
Types of Outdoor Projector Screens

Foldable and folding-frame outdoor screens
A folding-frame screen is a good starting point for home movie nights. The surface attaches under tension, and the frame packs into a bag or case. A 100- to 120-inch model is usually easier to carry and assemble than a 200-inch screen. Larger frames may need more helpers. Follow the setup and anchoring instructions for the exact model.
Retractable outdoor screens
A weather-rated manual or motorized screen is great for a patio or outside wall. Check the mounting method, enclosure rating, material, tensioning and electrical requirements. A housing’s weather rating does not make the extended fabric safe in high wind. Retract the screen after use and observe the manufacturer’s limits.

Inflatable Outdoor Movie Screens: Sealed-Air vs. Continuous-Air
Inflatable screens use an air-filled frame, with either sealed-air or continuous-air construction.
| Feature | Sealed-air inflatable outdoor movie screen | Continuous-air inflatable outdoor movie screen |
|---|---|---|
| Air system | Inflate, close the valves and disconnect the pump | Blower runs for the full event |
| Movie-time noise | No blower noise after inflation | Audible blower; place it away from guests when possible |
| Power needs | Power is needed for inflation; some pumps can use a battery | Continuous outdoor-safe AC power is required |
| Best use | Quiet backyard movie nights and portable 150- to 200-inch setups | Large community, school and professional event screens |
| Main tradeoff | Pressure and valves must be checked during setup | More cables, energy use and background noise |

Either type needs a flat surface, correct anchoring and space for the frame, ropes and stakes. Check pressure, valves and screen tension during setup. Let wet equipment dry before packing it away. Large inflatables may be portable in storage yet still require several people to erect safely.
Professional and event-size inflatable screens
Look closely at whether an inflatable’s advertised size describes image diagonal, image width or the outside of the frame. The Elite Outdoor Movies Home 20, for example, has a removable 20-by-11-foot viewing surface, about 23 feet diagonal, and a blower that runs continuously during use.
That 220-square-foot surface needs approximately 6,600 to 8,800 projector lumens for about 103–137 nits at 1.0 gain. This is event equipment, with corresponding demands for audio, power, anchoring and staffing. Have a projection specialist check the complete system rather than extrapolating from a small backyard setup.
Front versus rear projection
Front projection works with the conventional matte-white materials used in many outdoor screens. Rear projection keeps the projector and its beam behind the screen, so guests in front cannot cast shadows by crossing between the equipment and the image. People and objects behind the screen can still block that beam.
Allow the required lens-to-screen distance behind the screen, plus room for the projector, ventilation and access. Use a material approved for rear projection and select the projector’s rear-projection image orientation.
Brightness depends on the selected material and viewing position. Rear-projection surfaces are not universally lower gain. The Elite Yard Master 2 WraithVeil Dual, for example, supports front or rear use at a stated 0.8 gain. In the planning formula, 0.8 gain requires 25 percent more projector output than 1.0 gain to reach the same luminance. Other materials have different gain and viewing-angle tradeoffs.

Tripod screens, screen paint and DIY surfaces
A tripod screen is quick to open and compact to store, but its small base makes wind stability a concern. Verify that the particular model is approved for outdoor use and follow its support instructions. Do not leave it unattended outside.
Projector screen paint can suit a permanent surface if both the coating and substrate are appropriate for exterior exposure. The wall still needs to be flat, smooth and properly prepared. Paint will not hide mortar joints, coarse texture or an uneven wall.
A DIY frame can work with projection-grade material, even tension and a sound anchoring plan. Include the cost and work of supports, weather exposure and dry storage when comparing it with a purpose-built screen.
Other Outdoor Screen Attributes: Color, Gain and ALR Materials
A neutral matte-white material around 1.0 gain is a sensible starting point for wide seating after dark. Gain describes how a material directs light relative to a reference surface. Higher gain can increase luminance in favored viewing directions, with tradeoffs that may include narrower viewing angles or uneven brightness.
A plain gray surface reduces both projected light and reflected ambient light. It does not selectively reject ambient light just because it is gray. ALR materials use directional properties to favor the projector’s light over light arriving from other angles. Their effectiveness depends on projector position, seating and the direction of the unwanted light; they cannot reject light that arrives along the same path they are designed to accept.
With an RGB-laser projector, try material samples when possible. Laser speckle can vary with projector, material and viewer. A photograph or a conceptual illustration cannot tell you exactly what you will see from your seat.
“4K-ready” and “8K-ready” are not screen pixel counts. For image detail, look for smoothness, flatness and uniformity at the intended viewing distance.
Can You Use a Bedsheet as an Outdoor Projector Screen?
A sheet can establish whether you enjoy backyard projection before buying a screen. Expect compromises: light can pass through the weave, wrinkles alter the image, and loose fabric moves easily. A backing that blocks light can reduce light passing through the sheet, but it will not remove wrinkles or smooth the weave. For regular viewing, a smaller tensioned screen is usually the better purchase.
Outdoor Projector Screen Sizes: 100, 120, 135, 150, 180 and 200+ Inches
Measure the whole setup: image, frame, legs, ropes, stakes, projector position and walkways. Image diagonal alone does not describe how much of the yard the equipment will occupy.
Start with the main seats about one to one-and-a-half screen widths from the image. For a 120-inch, 16:9 screen, that is roughly 9–13 feet. Adjust for preference, resolution, subtitles and sightlines. Audience capacity depends on chair width, aisle access and row spacing, not simply the screen diagonal.
| Image diagonal | Image width × height | Screen area | Main seating range | ≈137 nits at 1.0 gain |
|---|---|---|---|---|
| 100 inches | 7.3 × 4.1 ft. | 29.7 sq. ft. | 7–11 ft. | 1,190 lumens |
| 120 inches | 8.7 × 4.9 ft. | 42.7 sq. ft. | 9–13 ft. | 1,710 lumens |
| 135 inches | 9.8 × 5.5 ft. | 54.1 sq. ft. | 10–15 ft. | 2,160 lumens |
| 150 inches | 10.9 × 6.1 ft. | 66.8 sq. ft. | 11–16 ft. | 2,670 lumens |
| 180 inches | 13.1 × 7.4 ft. | 96.1 sq. ft. | 13–20 ft. | 3,850 lumens |
| 200 inches | 14.5 × 8.2 ft. | 118.7 sq. ft. | 15–22 ft. | 4,750 lumens |

A 120-inch screen offers a substantial image without the handling and brightness demands of an event screen. Move to 150 inches when the audience and space justify it. At 180 to 200 inches, allow more assembly help and enough room for secure anchoring. Check overhead branches, sprinklers, fences and property boundaries before committing to the larger frame.
Outdoor Projector and Screen Tips
How to Set Up a Backyard Movie Theater
1. Choose the screen location
Observe the yard near the planned start time. Keep direct sun, porch lights and streetlights off the surface. There is no universal compass direction that works for every yard; the local light sources and sightlines matter more. Avoid places where wind funnels between buildings or sprinklers can start unexpectedly.
2. Assemble and anchor the screen
Follow the manual, including the required number of helpers and every specified support. Leave clear walkways around guy lines and ballast. Take the screen down before rising winds reach the model’s operating limit; additional improvised weights are not a substitute for following that limit.
3. Place the projector before guests arrive
Use the throw calculation to set the lens-to-screen distance. Set the projector’s height using the manual’s lens-offset or lens-shift guidance. Start square to the screen and use optical adjustments before digital correction. Mark the stand’s location once the setup works so you can repeat it. Keep people, pets and balls away from the equipment and beam while preserving ventilation clearance.
4. Connect and test the source
Check streaming logins, internet access, HDMI cables and the exact title. Wi-Fi is optional if you have a working HDMI source, disc player or permitted offline playback. Bring the remote and spare batteries. Resolve updates and account problems before the audience sits down.
5. Add sound sized for the audience
Built-in speakers can work for a small group close to the projector. For a larger audience, place powered speakers near the screen and aim them toward the seating. Check dialogue from the farthest seat, keeping the level considerate of neighbors.
A wired audio connection avoids Bluetooth pairing problems and wireless dropouts. Bluetooth can work, but test for delay, dropouts and lip-sync errors with the exact devices. Outdoor sound has less reinforcement from room boundaries, so judge the result outside rather than relying on a living-room test.

6. Provide suitable power
Use outdoor-rated extension cords sized for the connected load and a GFCI-protected supply. Keep connections dry, inspect cables and avoid daisy-chaining extension cords. Route power away from water and pedestrian paths, using suitable cable protection where a crossing cannot be avoided. Have permanent wiring installed to local code by a qualified electrician. See the Electrical Safety Foundation International’s extension-cord guidance.
Choose a power station that can run the projector, source, speakers and any blower together and handle startup surges. Estimate runtime from watt-hours, actual load and inverter losses, leaving a reserve beyond setup and the movie. Speaker amplifier wattage is not the same as the system’s AC power consumption.

7. Rehearse and pack away
Test framing, focus, subtitles and the complete audio/video path while there is still light to troubleshoot. Recheck focus after warm-up. Keep a flashlight handy, and bring non-weather-rated electronics indoors when the movie ends. Dry the screen before packing it according to its instructions.
Weather and Safety Checklist
- Check the forecast, wind and radar before setup and as conditions change.
- Keep electronics and power connections clear of rain, sprinklers, wet grass and pools. A dust rating does not establish water protection.
- Dismantle the screen before rising winds reach its operating limit, and observe the projector’s ventilation requirements.
- If you hear thunder, stop and move to a substantial building or enclosed, hard-topped vehicle. Do not delay taking shelter to pack equipment; a patio roof or canopy is not lightning protection. The National Weather Service advises waiting at least 30 minutes after the last thunder before resuming outdoor activity.
- Plan teardown and dry indoor storage before starting the event.
Outdoor Movie Night Checklist

- Projector, power cord and stable stand or table
- Screen, frame, surface and all specified anchoring hardware
- Source device, working media access and HDMI cable
- Outdoor-rated power cords, GFCI protection and cable covers
- Speakers, audio cables and stands as needed
- Remotes, spare batteries, flashlight and low-level path lighting
- Chairs, blankets and verified subtitle or caption settings
- Weather plan and dry storage space
For a public or organizational screening, check whether you need a public-performance license. This may apply even at a private venue if the audience extends beyond the normal circle of family and social acquaintances. Buying a disc or paying for a personal streaming subscription does not automatically grant those rights. Check with the distributor or rights holder.
Compare our lifestyle projectors, laser projectors and projector-and-screen bundles. For help checking brightness, placement and screen fit, send our projection team your planned screen size, lens-to-screen distance, viewing time and site photos.


