


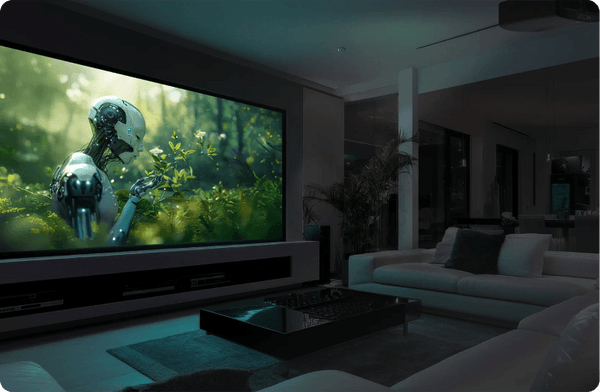
Projector Screen Calculators
Enter your room once. Every tool below uses the same numbers, so you can see the view from your seat, check brightness, and find screens that fit.
Your room
Measure from your eyes to the screen wall.
Simple Projector Calculator
Pick any projector by brand and model, then set the screen size to see the throw distance, zoom range and brightness.
Loading the calculator…
The seat view is in a floating window. It keeps updating as you change anything on the page.
What the lines mean
- Easy glance (inner ring, ±15°). Everything inside it is seen with small eye movements. Your head stays still. Human-factors guidance for displays: ±15° is the optimum eye rotation (FAA AC 25.1322-1, GAMA Publication 10).
- Eye limit (outer ring, ±35°). The most your eyes turn without moving your head (same guidance: ±35° maximum sideways). Anything outside it needs a head turn.
- SMPTE 30° outline. The screen size that fills 30° from this seat, the low end of the recommended range.
- THX 40° outline. The screen size that fills 40° from this seat, the THX best-seat size.
- IMAX 55° outline. The screen that fills 55° from this seat, an IMAX-style wall of picture.
- Sight lines. From your eyes to the corners of the screen. In Side view they show how far you look up to the top of the picture and down to the bottom, and whether the front row is in the way.
From your seat
Seating ranges for this screen, near to far. Click the bar to move your seat.
Top-down plan
Drag the dot to move your seat forward, back or side to side. Everything else updates.
Brightness from your seat
Uses the projector and settings from the Brightness tab. Brightness falls off with the angle between your eyes and the screen, using the surface's half-gain angle. Room light is treated the same for every surface (like matte white) until we have measured how each material reflects it. Both are estimates.
Screen size
Enter any one measurement of the viewable area. The others fill in, and every other tool updates.
Where to sit for this screen
Distances for this screen
What size for your seat
Brightness
The seat view, with your projector, screen and room light. Change anything below and watch the picture brighten, dim or wash out.
Brightness on the screen depends on the projector's light, the screen size and the screen's gain. Rated lumens are a best case, measured in the brightest mode with the zoom at its widest.
Compare sizes
Compare any two sizes side by side, like the 85″ TV you have now and the 120″ screen you're considering. Both are drawn to scale next to a person.
Second size
Display B
Throw distance
Where can the projector sit? The green bar is the range of distances from the screen at which this projector fills your screen; the arrow is the spot you plan to use.
Lenses for this projector
Compare projectors
Compare two projectors spec by spec: lumens and where each number comes from, native and ANSI contrast, and how they stack up on your screen. Both use the room light, screen surface and walls set below.
Projector A
Manufacturer's rated contrast (reference only)
Projector B
Manufacturer's rated contrast (reference only)
Why three contrast numbers?
Dynamic contrast is the number most spec sheets lead with. It compares an all-white frame to an all-black frame with the auto iris or laser dimming working, so the projector gets to change its light output between the two. It shows what the dimming can do, not what you see within one picture, and it can't be converted to the other two numbers.
Native (sequential) contrast, also called on/off contrast, is the same full-white vs full-black test with the iris fixed and laser dimming off. It's the projector's real capability, and it decides how black a dark scene looks.
ANSI contrast is measured on a 4×4 checkerboard of white and black squares in one picture. Light scattering in the lens and bouncing off the room lifts the black squares, so it's always much lower. For example, a projector rated 1,000,000:1 dynamic might measure around 5,000:1 native and only 100–200:1 on the checkerboard.
The comparison uses native and ANSI contrast. The manufacturer rating is shown for reference only.
Find a projector
Answer what you know about your room. Skip anything you don't. We only show projectors we carry, and each answer narrows the list right away.
1How big is your screen?
2How far from the screen can the projector sit?
3How much light is in the room?
4How sharp, and how much to spend?
5Where will it go?
More filters brand, technology, light source, lens, contrast
Brightness is the maker's rating. Contrast only matches models with a published native figure.
Results
Conversions
Type in any box and the others update.
Screen brightness
1 ftL = 3.426 nits. SDR targets are about 14–16 ftL (48–55 nits) in a dark room. HDR projectors often reach 100–250 nits.
Room light
1 fc = 10.764 lux. A light meter or phone app usually reads lux. Dim lamps put about 1–5 fc on a screen; a lit living room, 10–30 fc.
Length
Lumens to screen brightness
ftL = lumens × gain ÷ screen area in square feet. Type a target ftL or nits to see the lumens you'd need. Starts with the screen in Your Room.
Throw ratio
Distance = throw ratio × image width. Change any box and the one you touched least recently updates.
Same height, different shape
Contrast ratio
Each photographic stop doubles the range: 1,024:1 is 10 stops, about 32,768:1 is 15. Use native (sequential) contrast, not dynamic.
Viewing angle
SMPTE recommends at least 30°, THX 36–40°. Type an angle to see the seat distance for your width.
Save your room
Free to use. Add your email and we'll save this setup, send you a link back to it, and a copy of what you built.
Like where this is going? Save this room and we'll email you a link back to it.
Projector calculator questions and answers
Using the calculators
The projector calculators help you plan screen dimensions, seating distance, projector throw distance and estimated screen brightness. The Room Designer brings those choices together so you can see how changing the screen, seats or projector affects your setup. Start with the room and your main seating position. Choose a screen size, check that the projector can fill it from the available position, then compare brightness using the screen material and room lighting you expect to use. A screen that fits the wall can still be too large for comfortable viewing or too demanding for the projector. Use the results to narrow your options, then check the selected products’ installation drawings and specifications before ordering or drilling. Our screen buying guide explains how the room, projector and screen work together.
Choose a projector screen size by balancing seating distance, wall space, projector placement and brightness. The largest screen that fits the wall may be uncomfortable to watch or too demanding for the projector. Enter your main seat distance in the Room Designer or Viewing Distance calculator. Compare a more relaxed view with a more immersive one, then check the screen’s actual width and height. Leave room for the frame, speakers, furniture and any required clearance. Next, use Throw Distance and Brightness to confirm that your projector can fill that image at the planned location. If possible, mark the image outline on the wall and view it from your usual seat before choosing. Our projector screen buying guide explains the screen options in more detail.
The required distance depends on the projector’s throw ratio and the image width. For a conventional projector, multiply image width by throw ratio to estimate the distance from the lens to the screen. For example, a 120-inch 16:9 image is about 104.6 inches wide. With a 1.5:1 throw ratio, the lens needs to be about 157 inches, or 13.1 feet, from the screen. A zoom lens may provide a range of usable distances. Measure from the manufacturer’s specified optical reference point, usually the lens on a conventional projector. Allow space for the body, cables and ventilation. For UST models, the rear cabinet gap differs from optical throw distance; use the installation diagram. See our projector placement guide.
The lumens you need depend on image size, screen gain and how much light reaches the screen while you watch. A projector’s lumen rating alone cannot tell you whether the picture will look bright enough in your room. In the Brightness calculator, enter your screen size, gain and usable output in the picture mode you will watch. For example, 2,000 usable lumens on a 120-inch 16:9, 1.0-gain screen calculates to about 46.8 foot-lamberts. On a 150-inch screen, that falls to about 30 foot-lamberts. Choose brightness headroom for your setup, and reduce light falling on the screen where possible. Our projector lumens guide provides room-specific planning targets and examples.
The geometry and brightness calculations work across projector brands when you have the relevant specifications. You need the image aspect ratio, the lens’s throw-ratio range and a realistic light-output figure for the picture mode you expect to use. A model appearing in a selector is convenient, but a matching brand name alone does not establish compatibility. Verify the exact model and lens: projectors in the same product family can have different placement requirements. If your model is missing, use manual inputs where available or ask our projection specialists to check it. UST and interchangeable-lens models need special attention to optical reference points, offset and lens choice. Our projector buying guide explains those specifications.
Screen dimensions and throw-distance calculations follow defined geometry, so they can be precise when the inputs are correct. Brightness, room-light and viewing-comfort results are estimates that depend on the equipment, materials and people in the room. A manufacturer’s rated lumens may differ from output in your chosen picture mode. Screen gain can vary with viewing position, and room light affects perceived contrast. A room drawing also cannot confirm ceiling structure, mounting strength or all installation clearances. Use the calculators to compare setups and identify potential problems. Before installation, verify lens and shift limits, overall screen dimensions and required clearances. Confirm final positioning and brightness with the actual equipment. See our projector buying guide for the installation checks.
Screen size
To calculate screen width and height, you need both the diagonal size and the aspect ratio. The same diagonal produces different dimensions on a 16:9, 16:10 or CinemaScope screen. For a 16:9 image, multiply the diagonal by approximately 0.872 for width and 0.490 for height. A 120-inch 16:9 screen therefore has a viewable image about 104.6 inches wide and 58.8 inches high. For another shape, select its aspect ratio in Screen Size instead of using the 16:9 factors. These are image dimensions; add the frame or housing separately when checking fit. Our screen buying guide explains viewable size versus overall size.
Choose a screen size that produces a comfortable horizontal viewing angle from your main seat. A larger angle fills more of your vision; a smaller angle gives a more relaxed view. For a 16:9 image viewed from 12 feet, a screen of about 89 inches diagonal produces a 30-degree horizontal viewing angle, while about 120 inches produces 40 degrees. These are useful comparison points, not a requirement to choose one exact size. Enter your eye-to-screen distance in Viewing Distance, then check brightness, wall fit and throw distance. For scope screens, compare image width and viewing angle instead of using a 16:9 diagonal shortcut. See the screen sizing and viewing guide.
A screen advertised by its diagonal, such as “120-inch 16:9,” normally refers to the diagonal of the viewable image area. It does not include the surrounding frame, motor housing, support legs or other hardware. That distinction matters when fitting a screen between walls, beneath a ceiling or above furniture. A 120-inch 16:9 image is about 104.6 inches wide, but the complete product can be wider. Motorized models can also have extra black drop above the image and a bottom bar below it. Compare the calculator’s image dimensions with the product’s viewable dimensions, then check its overall installation drawing for the space required. Verify the exact model, including black drop and housing where applicable. Our screen buying guide explains the sizing terms.
Mount the screen at a height that lets viewers watch comfortably while keeping the picture clear of furniture and other viewers’ heads. There is no single correct bottom-of-screen height for every room. Start with your seated eye height in the chair you will actually use. In the Room Designer, adjust the screen’s bottom height and look at the angles to its center and top. A large screen can become uncomfortable if it is raised simply to clear a cabinet. Check every seating row, including reclined positions. With UST, cabinet height and the required image offset also determine where the screen can sit. Confirm those measurements before mounting or buying furniture. See our screen placement guide.
A bigger projector screen is better only while it remains comfortable to watch and the projector can deliver enough light and detail. Increasing size changes several parts of the setup at once. At a fixed seating distance, a larger image fills more of your vision. That can make films more involving, but may make subtitles, games or sports harder to follow comfortably. With the same aspect ratio, increasing the diagonal from 120 to 150 inches adds about 56% more image area. The same projector output then produces only 64% of the original calculated brightness. Compare nearby sizes in the Room Designer, then recheck throw distance and brightness. Choose for your content and normal lighting as well as wall space. Our lumens guide shows why larger screens demand more light.
Throw distance
Throw ratio describes the relationship between a projector’s distance from the screen and the width of the projected image. Calculate it by dividing throw distance by image width, using the same units for both measurements. A 1.5:1 throw ratio means the projector needs 1.5 feet of throw distance for each foot of image width. An 8-foot-wide image therefore needs about 12 feet between the lens and screen. Screen diagonal is not the width and should not be substituted in this calculation. A zoom lens is usually specified with a range, such as 1.4–2.8:1. Match your available distance and desired image width to that range. The projector buying guide explains how lens specifications affect installation.
Multiply the image width by the projector lens’s throw ratio. If the projector has a zoom lens, calculate both ends of its throw-ratio range to find the usable placement range. For example, a 120-inch 16:9 image is approximately 104.6 inches wide. With a 1.4–2.0:1 lens, the estimated lens-to-screen range is 146.4–209.2 inches, or about 12.2–17.4 feet. Compare that range with your planned mount or shelf in Throw Distance. Measure to the screen surface, allow for the body and ventilation, and confirm image offset and shift limits. For UST cabinet placement, use the manufacturer’s diagram. Our projector buying guide explains the measurements.
These categories describe how far a projector must sit from the screen to produce a given image width. Short throw projectors make a large image from closer than conventional standard throw models; ultra short throw projectors use a much steeper optical path from very close to the screen. The category names are less useful than the exact throw-ratio range. At a fixed image width, a lower throw ratio means a shorter optical throw distance. It does not automatically mean better picture quality. Choose the lens type around your available space, mounting options and possible beam obstructions. UST systems also require careful cabinet height, screen flatness and surface compatibility checks. Our UST projector buying guide covers those installation differences.
An optical zoom lens lets you vary image size from a fixed projector position, or choose among several projector positions for a fixed screen size. Its throw-ratio range defines that flexibility. For an image 100 inches wide, a 1.4–2.0:1 lens gives an approximate throw range of 140–200 inches. A planned position outside that range cannot fill the screen using optical zoom alone. Check brightness and lens shift at the chosen zoom setting; optical transmission can change across the zoom range. Digital zoom resizes the image electronically and does not add optical lens range. Our projector buying guide explains these placement controls.
Lens shift moves the projected image vertically or horizontally while the projector remains level and square to the screen. It matters when the ideal mounting location is above, below or beside the image center. Optical lens shift avoids the electronic resampling used by digital keystone correction. It cannot extend the lens’s throw-ratio range or make a projector fill an unsupported screen size. Check the specific projector’s shift diagram. Maximum vertical and horizontal adjustments may not be available together, and manufacturers describe their ranges differently. Plan physical placement and lens shift first, then use digital correction only when needed. The projector buying guide explains the placement controls to check before choosing a mount.
A UST projector needs a very flat screen surface compatible with its steep projection angle. For a room with ambient light, choose an ALR or CLR screen specifically designed for UST illumination. A suitable matte-white screen can display a UST image in a light-controlled room, so UST-specific ambient-light rejection is not a requirement for the projector to form a picture. However, an ordinary ALR surface designed for a conventional projector may reject the UST projector’s light instead of directing it toward the seats. Confirm throw compatibility, screen orientation and supported image size with the screen manufacturer. Small waves are especially visible under UST projection. Our UST buying guide explains screen construction and placement.
Aspect ratio
Choose a screen aspect ratio around the content you watch most and how you want other formats to appear. For a mix of television, sports, streaming and games, 16:9 is usually the most flexible home choice. A 2.35:1 or 2.40:1 CinemaScope screen can suit a room focused on widescreen films. In a constant-image-height setup, those films appear wider while 16:9 content uses a narrower portion of the screen. That requires a compatible projector and lens arrangement. For presentations, match the screen to the typical source and projector: both 16:9 and 16:10 are common. Compare actual width, height and unused image areas before choosing. Our screen buying guide covers the format tradeoffs.
16:9 means the image is 16 units wide for every 9 units high. It describes the image’s shape, not its diagonal size or resolution. Both a small television and a 150-inch projection screen can be 16:9. Likewise, 1920 × 1080 and 3840 × 2160 pictures share the same 16:9 shape even though the latter contains four times as many pixels. To find height from width, multiply width by 9 ÷ 16: a 96-inch-wide 16:9 image is 54 inches high. Use Screen Size for diagonal conversions. Films with a different shape can still show black bars; our screen format guide explains why.
First decide which dimension you want to preserve: diagonal, image width or image height. There is no single equivalent diagonal when the aspect ratio changes, because each choice produces a different result. A 120-inch 16:9 image is about 104.6 inches wide and 58.8 inches high. At the same width, a 2.40:1 image is about 43.6 inches high and 113.3 inches diagonal. Keeping the original height instead makes the scope image about 141.2 inches wide and 153 inches diagonal. Enter the dimension you want to hold in Screen Size, then select the new ratio. Check wall fit, area and viewing angle before treating sizes as equivalent. See our screen format guide.
Black bars appear when the content’s active picture has a different shape from the screen. A movie delivered in a 16:9 video signal can still contain a wider theatrical image, with black bars encoded above and below it. On a 16:9 screen, displaying the entire wider picture preserves the composition and leaves unused height. Zooming to remove the bars can cut off the sides of the film. Stretching the image fills the space by distorting its proportions. A scope screen fits matching widescreen films, but 16:9 content leaves unused space at the sides in a constant-height setup. Masking covers unused areas without cropping or stretching. Our screen format and masking guide explains the options.
Constant image height is a projection setup in which different content formats keep the same displayed height while their widths change. A widescreen movie therefore appears wider than a 16:9 television program, rather than shorter within a 16:9 screen. It usually uses a scope-format screen and a projector with sufficient optical zoom, often with lens memories for repeatable switching. A compatible anamorphic lens and image-processing arrangement is another approach. Lens memory is convenient, but the optical range and installation still have to work. Check throw distance and brightness in each lens position, along with where black bars and subtitles will fall. A scope screen alone does not create constant image height. Our screen buying guide explains the format choice.
Brightness
Use ProjectorScreen.com planning ranges: 16–26 ftL for dark-room SDR, 27–39 ftL for dark-room HDR or low ambient light, 40–59 ftL for moderate ambient light, and 60+ ftL for high ambient light. These are editorial guidance, not standards. SMPTE ST 431-1 (ISO 26431-1) specifies 48.0 cd/m² (14.0 fL) for digital cinema, with tolerances of ±1.0 fL in review rooms and ±3.0 fL in cinemas. No published home-projector HDR brightness standard exists. Dolby Cinema reaches up to about 31 ft-L for 2D sources—a cinema reference, not a home standard. Use the calculator to check your screen size, gain and usable lumens.
Estimate screen brightness by multiplying usable projector lumens by screen gain, then dividing by viewable area in square feet. ftL = usable lumens × gain ÷ screen area in square feet Multiply ftL by 3.426 to convert to nits. For example, 2,000 usable lumens on a 120-inch 16:9 image (42.7 square feet), gain 1.0, gives about 46.8 ftL, or 160 nits. At gain 0.6, the estimate is about 28.1 ftL, or 96 nits. Use output for your actual picture mode where available. This estimate does not measure room-light washout or brightness uniformity across seats. The lumens guide explains the calculation and its assumptions.
A projector’s rated lumens may describe a brighter operating mode than the one you use for accurate movie viewing. Picture mode, laser or lamp power, color filters and optical zoom can all affect available light output. The screen changes the result too. A larger image spreads the light over more area, and a lower-gain surface sends less luminance toward the reference viewing position. Ambient light may make the picture look washed out even when the projector’s light output has not changed. Compare brightness using measured output in your intended picture mode when available. Check power settings, filter or lens maintenance specified by the manufacturer, and light-source age. Our projector lumens guide explains the differences between rated output and practical brightness.
Screen gain describes luminance from a screen in a specified viewing direction relative to a reference surface. It tells you about directional brightness, rather than the total amount of light the screen creates. In an idealized on-axis calculation, a 1.3-gain surface produces about 30% more luminance than a 1.0-gain surface with the same projector and image size. Actual results depend on illumination angle and viewing position. A higher-gain surface can have a narrower useful viewing area or more visible hotspotting. Compare gain alongside seating width, projector placement and the material’s light-rejection characteristics. Gain below 1.0 does not by itself guarantee better contrast. Our screen buying guide explains how to choose the material for the whole room.
An ambient light rejecting screen can help when light from windows or fixtures reaches the screen during viewing. It improves the balance between the projector’s light and unwanted room light arriving from directions the material is designed to reject. ALR cannot remove every source of glare. Light arriving near the projector’s accepted direction, or direct sunlight on the screen, can still wash out the picture. Blinds, lighting placement and room finishes remain important. Match the material to the projector’s throw geometry and your seating positions. UST-compatible and conventional-projector ALR designs are not automatically interchangeable. In a well-controlled dark room, a suitable matte-white screen may be a better fit. The screen buying guide explains the material and viewing-angle tradeoffs.
Viewing distance
Choose a seating distance that gives you a comfortable horizontal viewing angle for the content you enjoy. For a 16:9 image, roughly 1.2–1.6 times the screen diagonal is a useful starting range, with both measurements in the same units. For a 120-inch 16:9 screen, that is approximately 12–16 feet. The closer end produces about a 40-degree view; the farther end is near 30 degrees. Those examples describe immersion, not a rule that everyone must follow. Compare the nearest and farthest seats in Viewing Distance and the Room Designer. Consider subtitles, games and screen height. For other aspect ratios, use image width and viewing angle rather than a 16:9 diagonal shortcut. See our screen sizing guide.
4K can make closer seating more practical because its finer pixel structure is generally less visible than 1080p at the same image size. It can also let you use a larger screen from the same seat without making individual pixels as apparent. Resolution does not make every close seat comfortable. The viewing angle may still be too wide, the screen may be mounted too high, or the source may contain limited detail. Lens sharpness, focus, compression and your eyesight also affect how much extra detail you see. Compare viewing angle and detail in the calculator, then try content from your planned seat. Moving closer is an option, not a requirement for 4K. Our projector buying guide explains resolution and image-quality tradeoffs.
A horizontal viewing angle of about 30–40 degrees is a useful home-theater starting range. Closer to 30 degrees gives a more relaxed view; closer to 40 degrees fills more of your vision and feels more immersive. Here, viewing angle means the angle between the left and right image edges as seen from your seat. It is different from a screen material’s advertised viewing angle, which describes how brightness changes when you sit off-center. Compare several positions in the Room Designer. Games, sports, subtitles and personal preference can change your ideal distance. Check vertical comfort separately: a comfortable horizontal angle cannot compensate for a screen that makes you crane your neck. See the screen viewing-angle guide.
Plan both rows together, using the main row for your preferred image size and checking that the other row still has a usable view. The front row should remain comfortable, while the back row should see enough picture detail and have clear sight lines. Enter the actual seating locations, seated eye heights and screen height in the Room Designer. Test whether the back row can see the bottom of the image over the people ahead, including changes caused by reclining. A fixed riser height cannot solve every combination of screen height, row spacing and chair design. Allow for walking space and extended recliners. Check riser structure, steps and headroom before building; the calculator does not establish structural safety. Our screen placement and sightline guide explains options including risers and staggered seating.
Yes. Screen height determines how far viewers look upward or downward, so an otherwise well-sized image can become tiring if it is mounted too high. Judge the screen from your seated eye position, including your normal recline. Keeping the main viewing area near your natural line of sight is a useful starting point, but the best position depends on image height, seating distance, furniture and other rows. There is no universal rule that every screen’s center must be at exactly the same height. Adjust screen-bottom height in the Room Designer and check the angles to its center and top. Balance comfort with clear sightlines, then confirm that projector offset and lens shift can reach that position. See our screen placement guide.


