


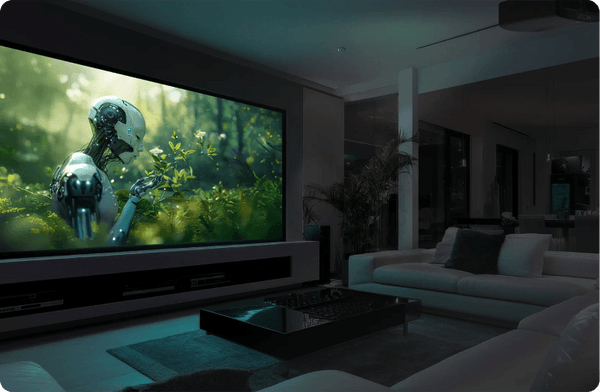
A little room in front
Projects from a position in front of the screen. Check the model’s throw ratio to see how much lens-to-screen distance you need.
Estimate distanceEligible products
Bundle and Save
When you add an item from 2 of the eligible categories
When you add an item from 3 of the eligible categories
When you add an item from 4 of the eligible categories
Make room for movies, games and more. Start with where your projector can sit, then find a model that fits your screen.
Explore short throw
Projects from a position in front of the screen. Check the model’s throw ratio to see how much lens-to-screen distance you need.
Estimate distanceDesigned to sit very close to the screen. Cabinet depth, screen height and the manufacturer’s placement chart matter together.
Explore USTConsider standard throw when your room allows a longer projection path. Placement and zoom ranges vary by model.
Explore standard throwThrow ratio is lens-to-screen distance ÷ image width. Here, 0.4:1 to below 1.0:1 is short-throw capable; below 0.4:1 is UST, and 1.0:1 or above is standard throw.
A 0.8:1 lens fills an 8-foot-wide image from 6.4 feet away. Short-throw lenses may have limited optical zoom or none; check the model’s full optical range.
Measure from the lens to the screen surface. For UST, use the model’s placement chart for cabinet position and screen height.
16:9 estimate only. Confirm the model’s optical range, supported image size and screen-material compatibility. Golf screens with other proportions need the model’s calculator.

Some lifestyle models combine short-throw-capable optics, built-in speakers and smart streaming in one unit. Their optical zoom may also support standard-throw placement.
Check the full throw-ratio range for your screen size and lens position.
Explore Lifestyle Projectors
A short-throw lens can reduce player shadows by placing the projector closer to the impact screen. Allow full swing clearance, ball-strike protection and a mount suited to the lens offset or shift.
Use the model’s calculator for 4:3, square or custom impact-screen dimensions.
Explore Golf Sim ProjectorsUse the model’s throw ratio and your planned image width. For a 120-inch 16:9 image, the width is approximately 104.6 inches; a 0.8:1 lens would sit about 83.7 inches away. That is an illustrative calculation. Check the exact model’s supported image sizes, zoom range and measurement reference before choosing your mounting position.
Further reading: Projector buying guide
A short-throw projector creates a large image from a shorter lens-to-screen distance than a conventional standard-throw model. It generally works farther out in the room than an ultra-short-throw model, which uses a steeper light path near the screen. Treat these as different installation types: a UST cabinet or optical screen is not automatically suitable for short throw. Check the actual throw ratio and supported image size.
Further reading: Related collection and details
A shorter light path can make it easier to keep people out of the beam, but it does not guarantee a shadow-free setup. Draw the beam path from the planned lens position to all four image corners. Check it against presenter locations, seating and any simulator swing area. Screen size and mount height must work together before the projector is selected.
Further reading: Projector buying guide
Match the projector to the task: readable text for teaching, input lag for gaming, and the required image shape for simulation. Then check screen-material compatibility, connections and whether the intended position leaves room for ventilation. If a model has little or no optical zoom, moving the projector may be necessary to change image size; allow for that in the installation.
Further reading: Projector buying guide
Check the exact lens ratio and supported image sizes first: 4K does not establish placement. Then compare the way the model displays detail, useful brightness, contrast and source compatibility. For gaming, verify input lag at the resolution and refresh rate you will use. Confirm that the screen material supports the proposed short-throw geometry; a UST optical screen is not automatically suitable.
Further reading: Projector buying guide
A projector close to the screen sends light across the surface at a steeper angle than a typical rear-room installation. Uneven walls or fabric can therefore make image distortion more noticeable. Level the projector and align the physical screen before using digital correction. Check the model’s offset and supported mounting orientation, since a short throw ratio does not guarantee that the lens can sit at any height.
Further reading: Projector buying guide
Use an impact screen intended for the activity and confirm the projector’s supported distance and mounting orientation. For a golf simulator, map the player’s swing, ball path and shadows as well as the image width. Protect the projector and leave the screen’s specified rear clearance. A short-throw lens can help with room depth, but it does not make an ordinary projection surface safe for ball impacts.
Further reading: Projector buying guide
Compare usable light output in the intended mode and calculate the image area. At the same aspect ratio, increasing diagonal by 25 percent increases area by about 56 percent. The same projector light then covers a larger surface. Screen gain and room light affect the result as well, so establish the required image dimensions and installation position before treating a lumen specification as a sufficient brightness recommendation.
Further reading: Projector buying guide
Bigger bundle, bigger discount — on every item!
5 %
7 %
10 %
Bigger bundle, bigger discount – on every item! Increased savings apply across all eligible products. The Build a Bundle discounts are on top of any sale pricing or current promotions, so items on sale will net you even more of a discount.


