Home Theater Lighting Guide From The Experts
Building your perfect home theater isn't quite as simple as buying a projector and screen and calling it a day. You need a powerful sound system, comfortable seating and the often underrated aspect of importance, the home theater lighting.
Home cinema lighting means more than just the ability to turn lights on and off. You need at least two “scenes” (lighting settings) – one with brighter lighting for setting up/cleaning up the room and second one to enhance the in-film experience, a “movie-mode” lighting setting. In the event you’re looking to host parties, consider a third or fourth scene. For example, if you’re planning to host viewing parties for sporting events like the Super Bowl, you’ll want to consider how much lighting will serve the function of the event without taking away from the quality of the viewing experience (remember to keep in mind the lumen output of the projector – check out this projection calculator if you need help determining the right output for your projector.
For general set up/clean up lighting in your media room, you want to have bright, even lighting so that you don’t miss any popcorn crumbs when sweeping or vacuuming. Lighting during the film is more nuanced and will be determined by the design of the home theater room and personal preferences.
Lighting Scenes to Enhance Viewing Experience
The location and layout of light fixtures are critical. You want to avoid adding extra light on the projection screen, which can negatively impact the viewing quality. Any light cast onto your screen will diminish the quality of the projection, so you’ll want to avoid this mistake at all costs. You also want to avoid creating glare from the perspective of the theater seats. Put simply, glare is any light that is too bright for a comfortable viewing experience. You don’t want to be distracted from your movie because of the brightness of a light that you can see out of the corner of your eye. At the same time, your “movie-mode” scene can’t be completely devoid of ambient light. You need some lighting besides the projector so that everyone using the space can avoid accidents, like spilled snacks or tripping on steps.
Direct Lighting - Downlighting
The type of light fixtures you choose for your home theater room are just as important as the quality of their lighting. In a low-glare setting like a home theater, recessed lighting with a regressed lens is most highly recommended. Downlights, also referred to as “can-lights”, or “high hats”, are all the same type of recessed light fixture that can have a regressed lens. Recessed lighting means that light is embedded in the ceiling with the bottom-most portion of the light fixture flush with the ceiling plane. Regressed lighting means that the lens (the part of the fixture through which light directly shines) is located above the ceiling so all light shining into the room is a softer reflection from that lens. Think of the impact of putting a lamp shade over a light bulb. Without the lamp shade, the bulb is too bright and uncomfortable to look at. With the lamp shade, the light becomes softer and more comfortable. Regressed downlights are a great way to do home theater lighting that creates glare-free ambient light for your “movie-mode” lighting scene.
The angled inner portion of a downlight is called the reflector or bevel. This inner portion can be ordered with different colors, most commonly white, black, and clear anodized/alzak. When looking at the downlight itself, a white reflector will look the brightest and have the highest likelihood of causing glare; black provides the greatest amount of glare reduction, however, will be noticeable in white ceiling and can look grey when the lights are on; clear anodized/alzak provides moderate glare reduction and will look mostly the same whether the fixture is on or off.
LED downlights come in round and square shapes, can be flanged, mud-in, or trimless to fit the ceiling material and design aesthetic. Flanged trims have a small lip that cover up the rough opening in the ceiling. That means, if you plan to DIY your home theater lighting, a flanged trim is more forgiving because it can cover some imperfections from cutting into the ceiling. Mud-in, or spackle flange, trims have larger rings with holes to allow a carpenter to apply spackle right up to the aperture, or opening, of the downlight; mud-in trims are very popular in modern and contemporary aesthetics. Trimless fixtures fit into a perfect cut out in materials such as acoustic paneling, wood, or drywall. Trimless installations can be tricky, so if you prefer this type of trim, but sure to measure twice before you cut.
 |
 |
 |
Indirect Lighting – Cove or Uplighting
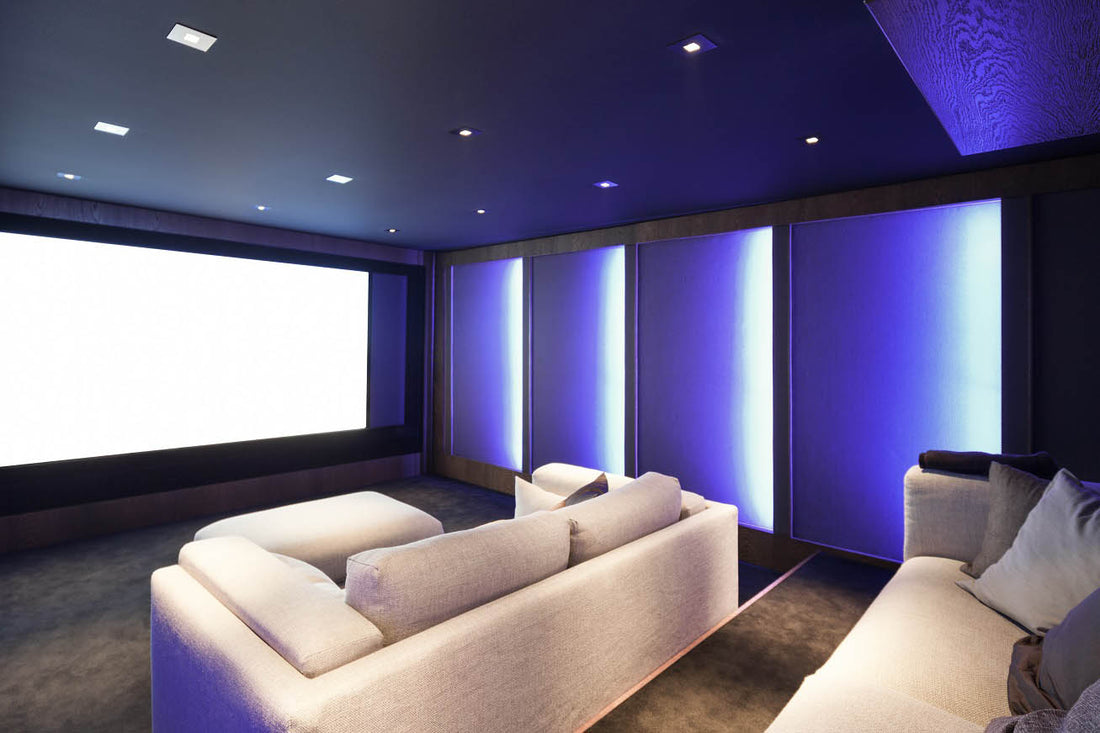
Indirect lighting is a great way to achieve a glare-free illuminated environment. By illuminating surfaces like walls and ceilings, you can increase the ambient lighting in a space without negatively impacting those within the space. This means that your projector can provide bright clear images without a dark cave-like setting. You still need to avoid any light spill onto the projection screen, so it is recommended to look at the ceiling first for indirect lighting opportunities. Indirect lighting is created by concealing the light source within a cove, or recess, in the wall or ceiling. Some fixtures create indirect light by shielding the light source from direct view, however most of these fixtures protrude from the wall/ceiling and therefore run the risk of interfering with projected images. Indirect lighting from a cove can be an effective lighting tool for home theater settings.

Lighting for Function
A home theater with fixed seats give you an opportunity to coordinate locations of narrow-beam pinspot downlights with your cupholders so that you can see your drinks and snacks. These pinspot lights, as the name suggests, will shine a narrow, pinpointed beam of focused light on a specific spot like cupholders or surfaces used for snacks to enhance the functionality of your space without creating glare or distracting from the viewing experience. The beam angle of the downlights should be narrow and the light should be dimmed to a relatively low output (~200 lumens).
In your “movie-mode” lighting scene, you will want to illuminate any steps or other potential safety hazards to avoid accidents. Step lights can be either small point sources or rope/tape light under the tread nosing. The length of your platform/steps and your own design aesthetic will inform the decision between choosing point source or rope/tape light for this application.
 |
 |
Lighting Considerations to Enhance Design Aesthetic
Lighting can enhance the design and décor of your home theater. Consider if there are movie memorabilia that you want to display in your home theater, or if you are trying to create a room with minimal visual distractions? Additionally, do you want colored accent lighting to create a particular feeling or ramp up the party mood to watch events?
If your home theater has decorations or features that you would like to highlight (movie posters, wood/brick walls, shelving with memorabilia, etc.), you can illuminate those features as a way to provide ambient/indirect lighting. Just like cove lighting, accent lighting can illuminate surfaces to add brightness to the room without affecting the quality of the movie projection.
The most common techniques are wall-mounted art lighting, integrated tape lighting, wall washing/wall grazing fixtures, or adjustable recessed lighting. Each of these techniques has a different application and outcome, but all yield accent lighting that will not detract from your viewing experience. If you are lighting movie posters, be sure to consider any reflected glare that may be caused by glass in front of the piece. Picture lights directly above a reflective surface would illuminate the piece with minimal reflections.
If you prefer your cinema room to have no decorations on the walls but still want to use accent lighting to create the ambient light for your space, you can consider low-brightness sconces placed at eye level or wall washing fixtures. Wall, floor, and ceiling color are especially important when creating ambient or indirect lighting. Dark colors will absorb light, while light colors will reflect light.
If your home theater has a multi-level ceiling, you can uplight the ceiling to provide ambient/indirect lighting. The two most common multi-level ceiling designs are to have a soffit around the perimeter (12”-24” wide) with a pop-up in the middle of the ceiling, or a tiered ceiling that steps up or down opposite the flooring (think large performance theater). Typically, the light source should be at least 1’-0” from the upper ceiling for an evenly uplit surface. If your ceiling height cannot accommodate this but you still want a cove, you can use a shallower cove, but the cove will act as more of an accent light. Just remember to reduce the light output so that you don’t end up with excess brightness, aka glare. Additionally, with a shallower the cove, the light will travel less far on the ceiling. You can also consider a perimeter crown molding that acts as a light shelf. No matter how you choose to uplight your ceiling, remember to have the lip of your soffit equal to or only slighter higher than the light source. If the lip of the soffit is much higher than the light source, you’ll have cut-off, or a shadow line, instead of a soft gradation. If the lip of the soffit is lower than the light source, you will likely be able to see the fixture, which is typically not desired.
If you want color changing or static color accent lighting in your home theater, look for RGB (Red Green Blue) or RGBW (Red Green Blue White) light fixtures. A common RGBW fixture family in the residential market is the Phillips Hue, however there are tons of options, including integrated shelf lighting, LED neon, fiberoptic, etc. As with conventional white lighting, you still want to minimize glare with colored light. Reducing light output and limiting the ability to see the light source are the two simplest ways to minimize and eliminate glare with colored light. When using colored light as an indirect light source, it is important to consider the finish onto which you are shining the light. Lighter, whiter finishes will represent all colors more naturally.
Technical Choices for Lighting
You’ll need to understand some technical aspects of lighting before you can confidently select and layout the lighting for your home theater. This includes the color temperature, color rendering index (CRI) value, type of fixtures and their respective components, and dimming compatibility.
Color Temperature
White light can be more amber (warmer) or more blue (cooler); this is known as the color temperature. Color temperature is measured in Kelvin (K). Lower numbers are warmer and higher numbers are cooler. 2700K is approximately the same color temperature as conventional incandescent lighting at full brightness. Therefore, 2700K is often the most desirable color temperature for homes. When going for a more contemporary aesthetic, many consider 3000K – a cooler light temperature. As a general rule of thumb, all of the different light fixtures in your space should have the same color temperature. Many home improvement stores have light boxes which showcase different color temperatures.

A feature that many people appreciate about incandescent light is that it gets warmer when dimmed. Even though LED chips don’t change color as they dim, LED lighting manufacturers have been able to replicate this experience through the use of warm dim/dim-to-warm/warm glow technologies by using multiple LED color temperatures within one lamp or fixture. Many manufacturers make LED bulbs and entire fixtures with this specialized dimming capability. Warm dimming is a more expensive choice, but it is important to consider the impact of color temperature range on the aesthetic of your home theater before making your final selection. Additionally, there are many different types of dim-to-warm technologies and they do not all work well together. If you decide that this type of experience is desirable, engage with a lighting designer before you finalize your specifications to ensure everything is compatible, dims well together, and will provide the same color temperature throughout your space regardless of scene selections.
Color Rendering Index (CRI)
Color rendering index (CRI) is the metric used to describe how well color appears when under different types of lighting. Getting high CRI value lighting is most critical when artwork or highly colored environments are being illuminated. Sunlight has a CRI of 100 because it has all of the wavelengths of visible light. Low CRI is why most people find fluorescent light to be unflattering, as fluorescent lighting tends to highlight green colors, but washes out reds. Most LED manufacturers provide CRI values higher than 80, however it is recommended to use light fixtures with a CRI higher than 90 to avoid colors from looking flat or unflattering.
Finishing Touches
Finally, you need to pull the home theater lighting together with a control system. With LED light sources, not all fixtures can be dimmed together. There are several different dimming platforms such as, Electronic Low Voltage, Magnetic Low Voltage, 0-10V dimming, and TRAIC. Because some LED fixtures may dim using different dimming platforms, it is recommended that each unique fixture type be controlled separately. This ensures that each fixture will dim as well as possible. Most fixture manufacturers also publish dimming compatibility charts, which can be helpful when determining the best dimming equipment to be used.
Many audio-visual (AV) vendors provide control systems that allow lighting to integrate into the AV controls. If you are working with an electrician on the lighting separate from the audio visual, you can get lighting controllers that set scenes, such as “cleaning” or “movie-mode” or “party-mode” or “display only”, to allow you to pre-set the lighting effect you desire during different scenarios. Some controllers have apps, which allow you to change the lighting from your phone, tablet, or smart speaker, which allows you to get comfy and settled before switching to “movie-mode”.
How Much Does Home Theater Lighting Cost?
The cost of home theater lighting can vary widely depending on the type of lighting you choose and the complexity of the installation. Here are some approximate costs for different types of lighting:
- Ambient Lighting: This is basic lighting that illuminates the entire room. The cost of ambient lighting can range from $100 to $500.
- Accent Lighting: Accent lighting is used to highlight specific areas or objects in the room, such as artwork or a movie poster. The cost of accent lighting can range from $200 to $1,000.
- Wall Sconces: Wall sconces are mounted on the walls and provide a soft, ambient light. The cost of wall sconces can range from $50 to $500 each.
- Fiber Optic Ceiling: Fiber optic ceilings can provide a starry-night effect in your home theater. The cost of a fiber optic ceiling can range from $1,000 to $5,000.
- LED Strip Lighting: LED strip lighting can be installed behind the screen or around the perimeter of the room to create a soft glow. The cost of LED strip lighting can range from $50 to $500.
Keep in mind that the above estimates are just rough estimates, and the cost of your home theater lighting will depend on various factors, including the size of your room, the type of lighting you choose, and the complexity of the installation. It's always a good idea to consult with a professional lighting designer or installer to get a more accurate estimate for your specific needs.
Need help with home theater lighting design? We know just the experts to talk to!
Lighting is a critical part of the home theater experience and sometimes it’s just best to call in a design professional who is experienced with the options and details available. Lighting designers specialize in the design and specification of lighting systems to meet each client’s unique requirements. Rebar Lighting Design is a Lighting Design Consultant who can provide tailored services, from hourly consultation through full-service design and specifications, to meet your project goals.

We highly recommend Rebar Lighting Design for all your home theater lighting design needs.


